
by Jenny Barnett
The garden doesn’t end in fall, it settles.
Like the land itself, it quiets down, tucks in, and asks for just one more round of tending before it sleeps.
Putting the garden to bed is an act of care. It’s how we say thank you. How we prepare the soil, the tools, and ourselves for the still season to come.
Here’s how we close out the garden with intention, one cleared row and sharpened spade at a time.
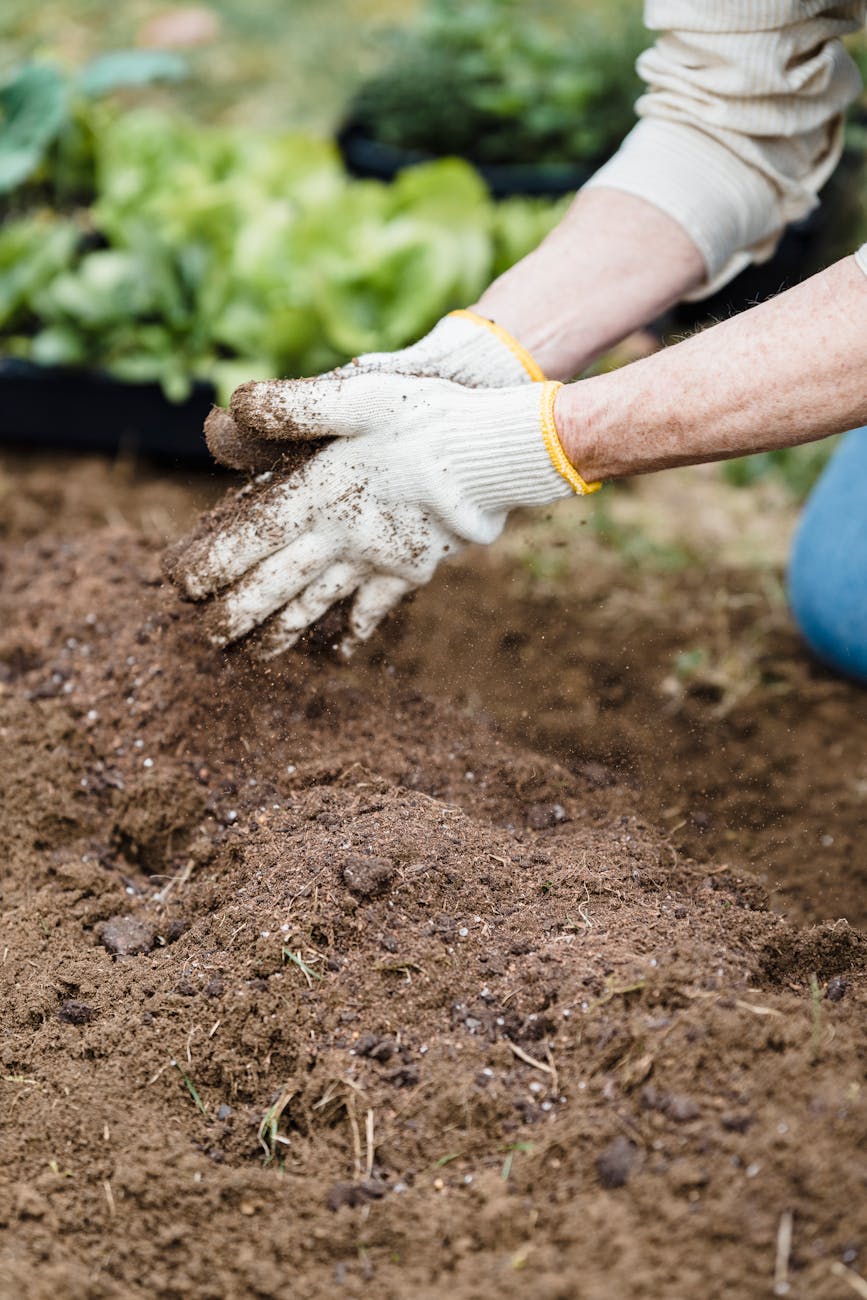
1. Clear Beds with Purpose
This isn’t about stripping the soil bare, it’s about cleaning up without disturbing the memory of the place.
- Pull out annuals, but leave the roots of healthy plants in the soil. They’ll feed microbes over winter.
- Chop and drop: cut greens and soft stems into sections and lay them over the bed as mulch.
- Remove diseased or pest-prone plants entirely, then compost healthy matter and burn or toss the rest.
Tip: Leave a few sunflower stalks or cornstalks standing. They catch snow, feed birds, and give the garden winter texture.

2. Plant the Garlic Before the Ground Freezes
Mid to late October is perfect timing for tucking garlic in for the winter.
- Choose hardneck varieties for cold climates
- Break bulbs into cloves and plant 2–3 inches deep, 6 inches apart
- Cover with 3–6 inches of mulch (straw, shredded leaves, or pine needles)
- Mark your rows clearly: come spring, you’ll be glad you did
Looking for the right variety? Check your local seed company or browse heirloom growers online, some even offer region-specific strains.

3. Mulch, Mulch, Mulch
Mulch is the garden’s winter quilt. It protects roots, suppresses weeds, and slowly feeds the soil as it breaks down.
- Use straw, shredded leaves, aged compost, or wood chips
- Apply generously around perennials, fruit trees, and garlic
- Avoid piling mulch right against stems or trunks, it invites rot and pests
This layer of softness holds the memory of warmth just a little longer.

4. Clean and Store Your Tools the Right Way
Tools that serve you all season deserve a little thanks too.
- Rinse off soil and sap with water and dry thoroughly
- Scrub wooden handles with steel wool or a stiff brush
- Wipe metal parts with oil to prevent rust
- Sharpen blades before storing, it’s easier now than in spring
Hang your tools up, don’t toss them in a pile.
We keep ours on iron wall hooks in the shed, a small upgrade that saves rust and frustration come planting time.
Need to restock? Consider investing in handcrafted tools made by real blacksmiths or heritage suppliers. They’ll cost more upfront, but they’ll hold up through decades of digging.

5. Feed the Compost. Feed the Soil.
Now’s the time to build your compost pile for winter:
- Add leaves, pulled plants, chopped stems
- Layer green (wet) and brown (dry) materials
- Keep it covered with a tarp, lid, or straw to retain warmth and moisture
- Turn once before the first freeze, then let it rest
If you don’t already have one, this is a great time to build or buy a compost bin — wooden slat boxes, barrel rollers, or DIY pallet systems all work well depending on your space.
The Garden May Sleep, But the Soil Never Stops
Putting the garden to bed isn’t the end. It’s a hand-off from the gardener to the earth, from the busyness of harvest to the quiet work below the surface.
So rake. Mulch. Clean your tools.
And then, like the garden, rest well.
— Jenny
Helpful Links:

Leave a comment